How does a 3D printer work? Understanding the Creation Process from Digital Model to Physical Object
Article Summary: This article provides a detailed explanation of how 3D printers operate, delving into the working steps of three mainstream technologies—FDM, SLA, and SLS—covering the entire process from modeling and slicing to layer-by-layer printing. Whether you’re a beginner, a manufacturer, or a tech enthusiast fascinated by cutting-edge innovations, you’ll easily grasp the magic of 3D printing.
Keywords: 3D printer working principle, FDM 3D printing, SLA , SLS laser sintering, 3D printing steps, 3D printing technology, additive manufacturing
In today’s era of rapid technological advancement, 3D printers have transitioned from laboratories and large factories into everyday studios, schools, and even homes. Hailed as one of the core technologies of the “Third Industrial Revolution,” have you ever wondered how this remarkable machine transforms a mass of plastic or a pool of resin into intricate physical models? This article unveils the mysteries of 3D printing technology.
Core Principle: Building Layer by Layer
Unlike traditional subtractive manufacturing (such as carving or cutting), 3D printing falls under “additive manufacturing.” As the name suggests, its core concept involves precisely stacking material layer by layer to form a three-dimensional object ultimately. Imagine building a castle with LEGO bricks or painting a picture stroke by stroke with printer ink—3D printing essentially replicates this two-dimensional layering and drawing process in three-dimensional space.
Although multiple 3D printing technologies exist, their workflows generally follow these three fundamental steps:
Step 1: 3D Modeling—Creating a Digital Blueprint
Every 3D-printed object begins with a digital model. This is akin to how architectural designs require blueprints. Typically, people use computer-aided design software (such as Blender, Fusion 360, or Tinkercad) to create or acquire a 3D model file (usually in .STL or .OBJ format). You can also download countless ready-made models online. This digital model defines the object’s precise shape, dimensions, and structure.
Step 2: Slicing — “Cutting” the 3D Model into 2D Layers
Once you have the 3D model file, it cannot be sent directly to the printer. It requires a crucial step called “slicing.” Slicing software (like Cura or PrusaSlicer) “slices” this three-dimensional model into thousands of extremely thin two-dimensional cross-sectional layers (like slicing a sausage into thin slices) and generates printer-readable instruction code (G-code). This G-code file precisely instructs the printer’s nozzle on how to move, where to extrude material, and all other relevant parameters, including layer thickness, printing speed, and temperature.
Step 3: Layer-by-Layer Printing—The Magic from Digital to Physical
Once the printer receives the G-code instructions, the actual manufacturing process begins. Depending on the underlying technology, the printing process varies significantly. Here are three mainstream 3D printing technologies:
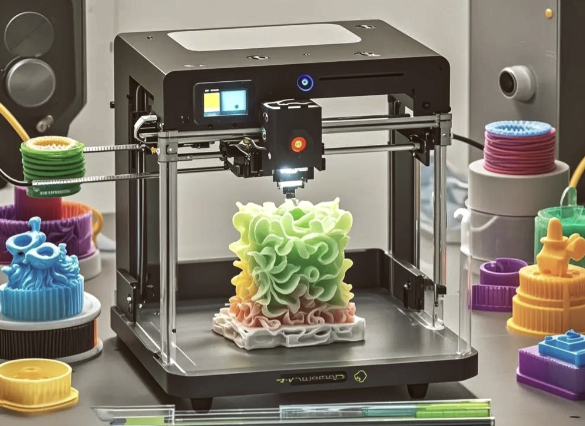
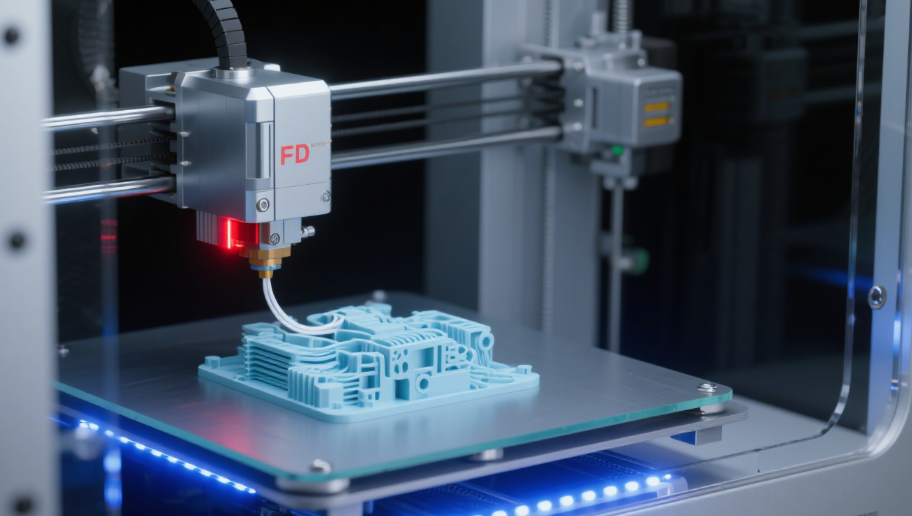
- FDM (Fused Deposition Modeling) — The Most Common Technique
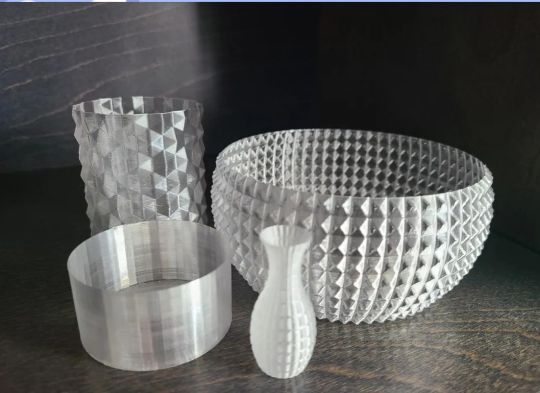
This is the most widely used technology in desktop printers. It employs a spool of thermoplastic filament (typically PLA or ABS). During printing, the filament is fed into a heated nozzle where it melts. The nozzle then moves along a path defined by the sliced model, extruding and depositing the molten material onto the build platform. Once the first layer solidifies, the platform slightly lowers (or the nozzle rises), and the next layer is printed. This process repeats until the entire object is complete. - SLA (Stereolithography) — The Choice for High Precision
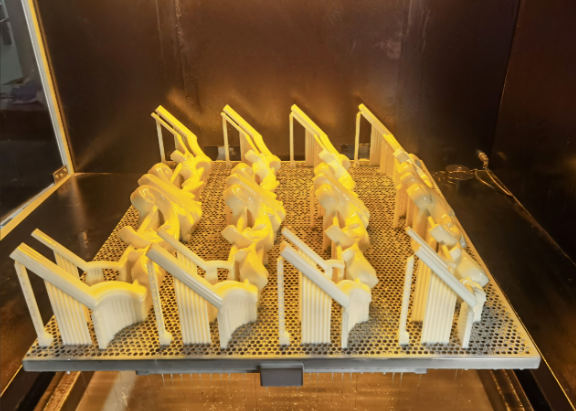
SLA technology utilizes a liquid resin sensitive to specific wavelengths of light. During printing, a laser beam or UV light source precisely illuminates the resin surface along the sliced contours. The exposed resin undergoes an instant photochemical reaction, solidifying the illuminated area. After each layer is cured, the platform rises slightly to allow fresh liquid resin to flow beneath, then the light source continues curing the next layer. SLA-printed models typically feature exceptionally smooth surfaces and extremely fine details. - SLS (Selective Laser Sintering) — For Durable Functional Parts
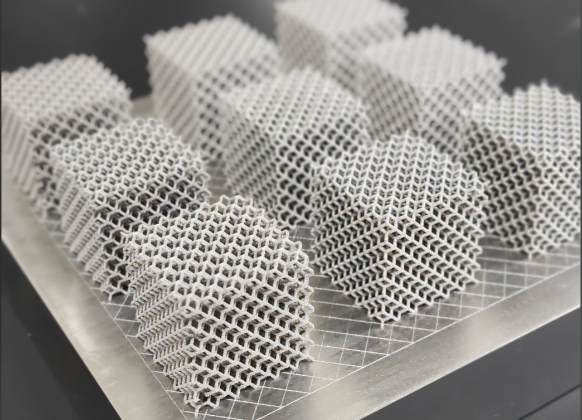
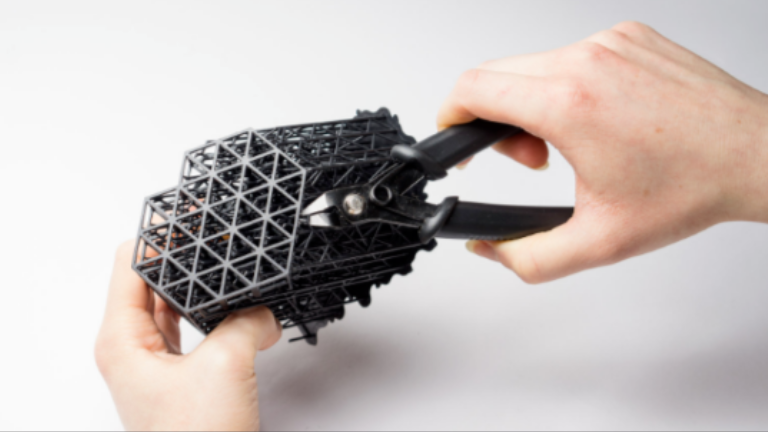
SLS technology employs a high-power laser to sinter microscopic nylon, metal, or ceramic powder particles. The laser beam selectively scans the powder bed, fusing particles in designated areas to form a solid layer. After each layer is completed, the powder bed descends, a new layer of powder is spread evenly by a roller, and the laser sintering process repeats, firmly bonding the new layer to the base. At the end of printing, unsintered powder acts as support material, enabling the creation of highly complex structures. This powder is subsequently removed.
Post-Processing: Final Touches
After printing, objects typically require post-processing steps such as removing support structures, sanding, polishing, coloring, or secondary curing for SLA models to achieve optimal appearance and performance.
In summary, 3D printing is a powerful tool that brings ideas from the digital realm into the physical world. Through its efficient and flexible workflow—modeling → slicing → layer-by-layer printing—it has revolutionized how we design and manufacture products. Its applications are expanding infinitely, from simple toys to intricate aerospace components. We hope this article helps you fully grasp how 3D printers operate!